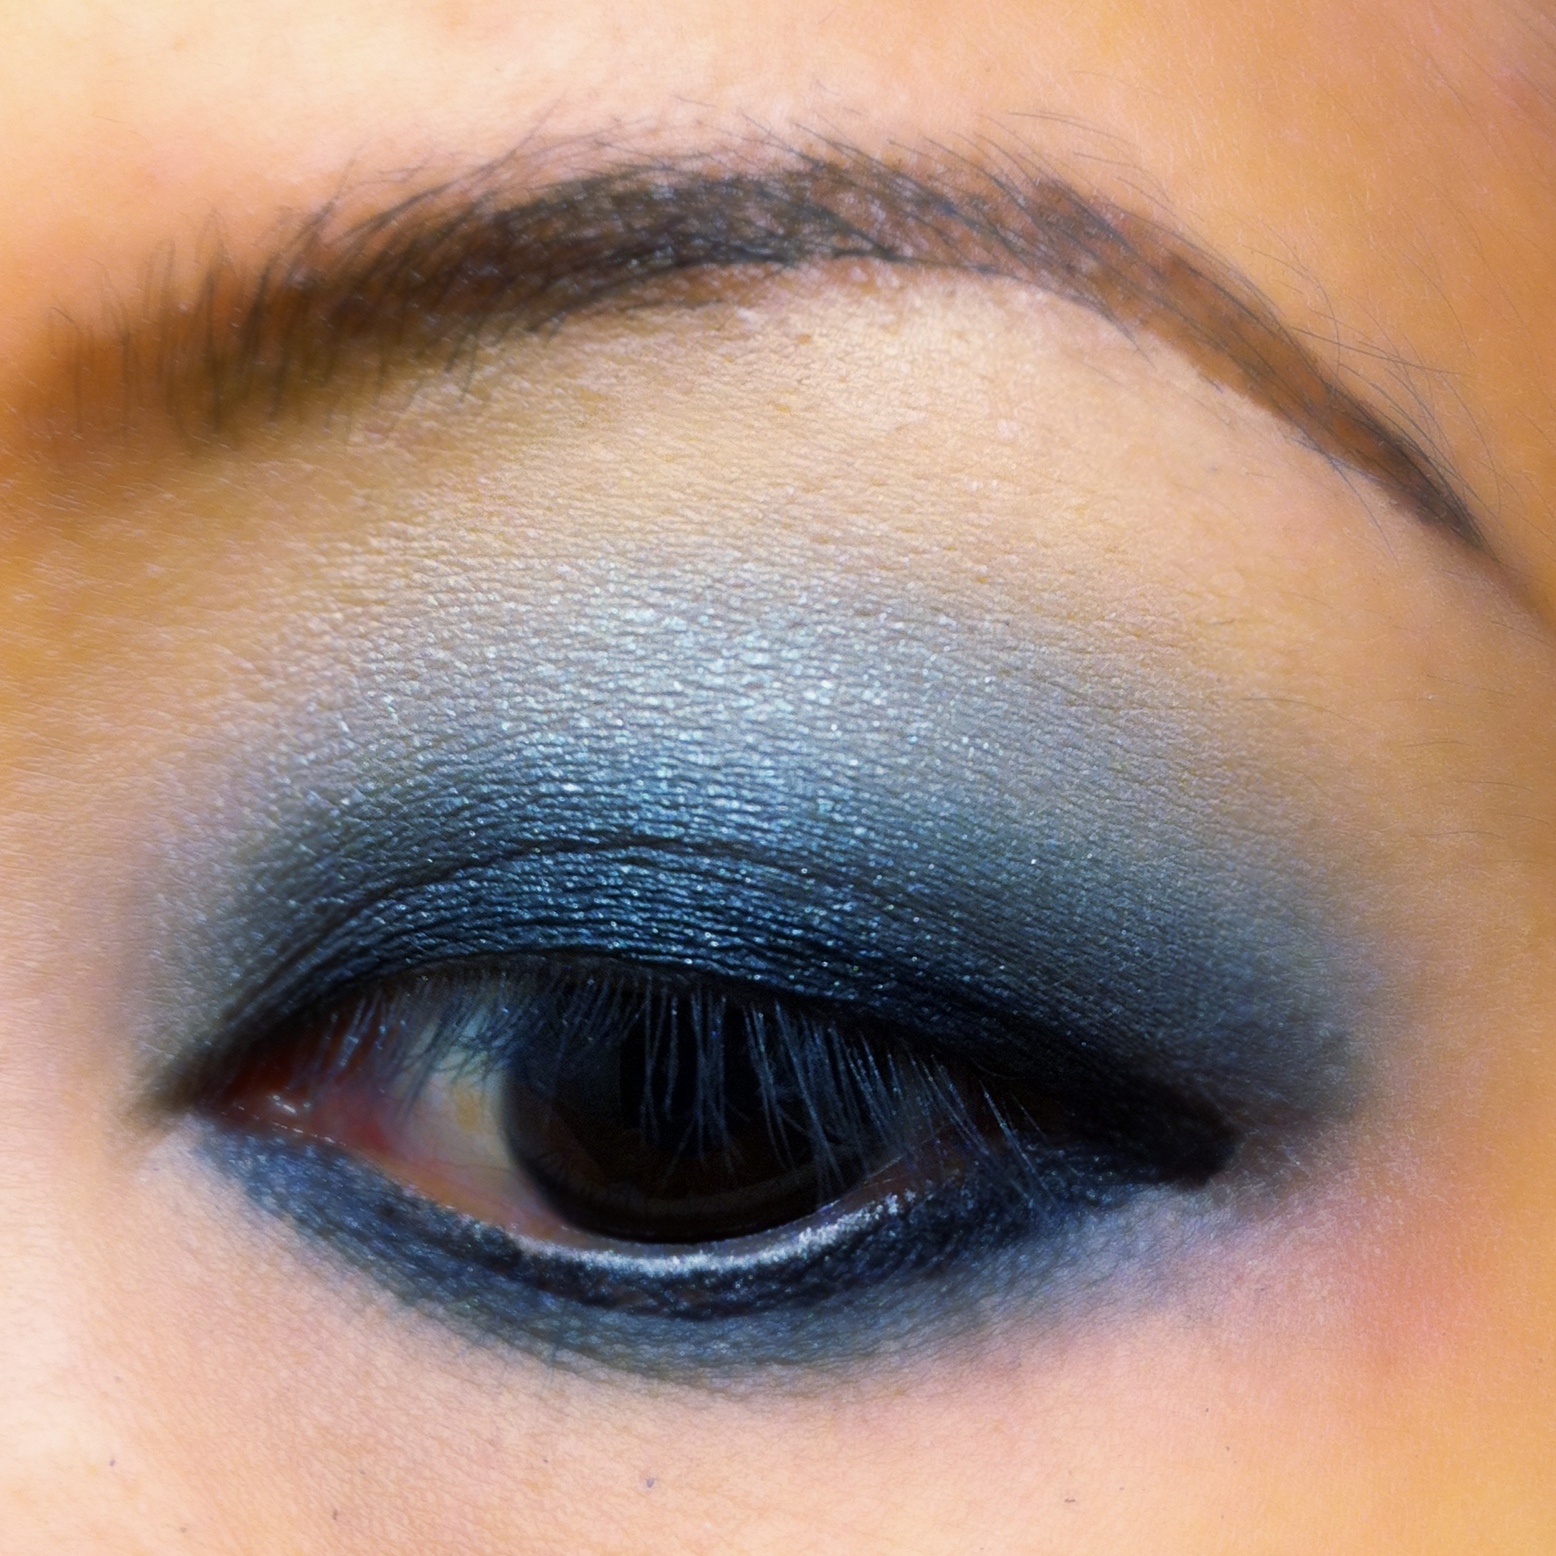
Feeling a little under the weather, but still wanted to look pretty so I did a simple-yet-sparkly look using Pug shimmer cream shadow by Buxom as well as Sephora silver glitter liner:
To start, I appy Pug all over my top eyelid:
Next, I line my bottom lid with black pencil liner:
Then I soften the liner with a little more Pug:
With black cream eyeliner, I draw a defined wing along my top lash line while redefining my lower lash line:
For more depth, I'm going to apply a little matte black shadow along the outer corners of my eye:
Then I'm going to enhance my top winged line with Sephora's glitter eyeliner in Silver:
Curl lashes, add mascara, and I'm all set to go!
Overall look:
Totally not wearing the right colored shirt for the makeup. Oh well, haha. Does this lippy look familiar? I wore it in the last post when I got my haircut. If anyone's interested, it's WnW Wild Shine Lipstick in 928 Fierce.
It's a glossy lipstick that's packed with shine. I like the smooth application and non-drying formula. As for long-lasting? Average, but the color is so pretty and for only $2.99, I'm not going to complain!
I'm also wearing a new pressed powder. I dislike purchasing high-end cosmetics, especially when they're not on sale, but I bit the bullet and purchased a compact of MAC Studio Fix, shown here in C3. Apparently, that's my color.
Studio Fix is a finely-milled pressed powder that offers excellent coverage over my tinted moisturizer. Does it work any better than other pressed powders I've used in the past? Not necessarily, but I did get a glowing compliment from a stranger today asking me how I get my complexion to look so flawless. Sigh. I guess hearing something nice did increase my opinion of this product, lol. I'm going to have to try it out for at least a few more days before I can form an honest opinion, but so far, so good. Set me back about $30 though. Ouch!
Well, that's all for today! I've been working on something kinda cool. Looking forward to posting it soon. :D Happy Monday and have a good night!
Showing posts with label silver. Show all posts
Monday, March 26, 2012
Glitter Pug
Labels:
928,
Buxom,
C3,
Fierce,
glitter,
MAC,
Pug,
Sephora,
silver,
Studio Fix,
Wet N Wild,
Wild Shine
Saturday, January 7, 2012
Dangerous Part 2
Good evening everyone! I'm going to make today's post short and sweet. Can you believe I've been out of the house from 8:45am this morning until now (11:45pm)? I took a short break for lunch during work to reply to comments and emails, but otherwise, I haven't had a moment to even think about blogging. But, here I am! So, I tried another look today with my new Urban Decay Dangerous palette, which, unfortunately, seems to be sold out at the moment. :(
Following the same technique for my previous Dangerous tutorial, I used these colors instead:
I used Gunmetal for the inner half of my upper eyelid, Oil Slick for the outer corner of my upper eyelid, and Haight along my bottom lash line. I also enhanced my upper lash line eyeliner with Sephora Glitter Eyeliner in Silver and applied Daiso false lashes. (Which you can enter to win in my latest GIVEAWAY!)
Well, that's it for tonight! Off to bed...I know it's early for a Friday night, but this Cat needs to hit the sack! :D
Sweet Dreams!
Cat
Following the same technique for my previous Dangerous tutorial, I used these colors instead:
I used Gunmetal for the inner half of my upper eyelid, Oil Slick for the outer corner of my upper eyelid, and Haight along my bottom lash line. I also enhanced my upper lash line eyeliner with Sephora Glitter Eyeliner in Silver and applied Daiso false lashes. (Which you can enter to win in my latest GIVEAWAY!)
Well, that's it for tonight! Off to bed...I know it's early for a Friday night, but this Cat needs to hit the sack! :D
Sweet Dreams!
Cat
Labels:
daiso,
Dangerous,
false eyelashes,
glitter,
Sephora,
silver,
Urban Decay
Monday, September 19, 2011
The Smoking Gun: Simple, Sexy, Smokey Gunmetal Eye
I seldom use silvers/grays for eyeshadow, which are pretty standard colors, so I thought I'd do a tutorial for a simple smokey eye. You'll only need 3 eyeshadow colors and it takes a total of 5-10 minutes to do. It's really easy, yet high-impact look:
So I start with a primed eye:
Next, I'm going to line my top and bottom lid lines with black pencil eyeliner:
Then I'm going to use the gunmetal shade from my ELF Studio Endless Eyes Pro Eyeshadow Palette and layer and smoke it over my black eyeliner:
Now, using the silvery gray shade from the palette, I'm going to blend and soften the edges of the gunmetal shadow:
Next, I'm going to darken the outer corners of my top and bottom lid lines with black pencil eyeliner:
Then, using the matte black shadow from the Endless Eyes palette, I'm going to smoke and layer over the black pencil liner in the outer corners of my eyes:
Using black gel/cream eyeliner, I'm going to re-define my top and bottom lid lines:
After adding curling lashes and applying mascara, you can finish here:
I'm going to take it one step further and add some Daiso false eyelashes for more drama:
All done! Hope you guys found this useful. Feel free to use any color with this smokey technique. You don't have to confine yourselves to grey. This would look pretty in blues, browns, greens, and purples! Just be sure to have a light, medium, and dark shade and you're all set!
Happy Monday!
Cat
Labels:
ELF,
false,
gray,
gunmetal eyelashes,
silver,
smokey eye,
tutorial
Subscribe to:
Posts (Atom)