Showing posts with label winged eyeliner. Show all posts

Wednesday, October 29, 2014

Lashes & Liner

Simple, black, ombre, cat eye liner to showcase Eazy Duz It mink lashes by Luxy Lash.


Eazy Duz It's crisscross design, volume, and length make them very dramatic lashes, yet they're incredibly lightweight, feels like I'm not wearing lashes at all! The liner design that I paired with these lashes is easy to do, yet looks very dramatic, requiring very few products. I'm considering making a tutorial/pictorial for it.

Products used:
  • Etude House Drawing Eye Brow Pencil in Dark Gray and gel eyeliner in Black
  • Sephora black pencil eyeliner
  • Kate Super Sharp liquid eyeliner pen in BK-1
  • Eazy Duz It mink lashes by Luxy Lash
Happy hump day everyone! :D

Hugs,
Cat

*This post contains commercial samples provided by the manufacturer for the purpose of review.

Wednesday, October 15, 2014

Rose Gold Glitter Cut Crease

Really quick post today! Just wanted to share a glittery cut crease that I did today. I chose a rose gold theme and Eye Kandy Cosmetics had the perfect color for my look: Taffy. I used the "fine" texture as opposed to the "superfine" to get as much sparkle as possible. This is a fantastic look for autumn due to the warm, rosy hue. Also good for fall/winter weddings for brides that are more dramatically inclined.

I also played around with a fake, dramatic brow by filling in my brows with L'Oreal Lacquer Liner in Bronze and then sketching in brow hairs using Eyeko Visual Eyes liquid pen liner in Mocha.


Products used:

  • L'Oreal Lacquer gel liner in Bronze and Eyeko Visual Eyes eyeliner in Mocha for brows
  • Urban Decay Primer Potion in Eden
  • L'Oreal Lacquer gel liner in Bronze and Urban Decay Naked 3 in the crease as well as lower lid
  • Eye Kandy Cosmetics Taffy glitter (fine "F" texture) on the lid as well as a matching shade of rose gold from Naked 3
  • Eyeko Eye Do eyeliner
  • Luxy Lash "Woke Up Like This" eyelashes
I don't have a video tutorial for a cut crease at the moment, but if you'd like to see one and can't wait, I would recommend JLINHH and Glam&Gore on YouTube.

Happy hump day and thanks for reading!

Hugs,
Cat

Wednesday, October 8, 2014

Halloween Makeup Ideas

Halloween is just around the corner so I've been experimenting with magically festive looks for this famously spooky holiday! (my favorite, by far!)

I've posted all the minute details to my Instagram account, but here is a sparkly, Jack-O-Lantern inspired look with a dramatic, triple-wing:


And here is a shimmering, blue look whose focal point is a little star shape masked out on the lower lid:


Hope this gives some of you ideas for fun looks for Halloween! As for blogging, I've got a ton of cool stuff backed up, so I'm trying to catch up on all of my social media platforms! I feel bad just concentrating on Instagram, so I'm earnestly trying to work on it!

Thanks to those of you who are still sticking around and I'll be back with the next post, ASAP! :D

Hugs,
Cat

Wednesday, April 2, 2014

Video Tutorial: Metallic Bronze Gradient Cat Eye

Oh, been meaning to post this. I filmed this vid about a week ago or so, but never got around to editing it until now. Whoops. Well, anyhoo, here you go! Hope you guys like it! ^_^ Please subscribe, if you can, I'd really appreciate it! <3


Excuse the weird voice. My cold was at its worst when I did the voiceover. Lol.


Thanks for watching! :)

Hugs,
Cat

Thursday, March 27, 2014

Epic Metallic Emerald Wings with Stila Magnificent Metals

Here's a look I did for a Kraftwerk concert I attended a couple nights ago. I figured, since it's a concert, I could get away with a less-than-conventional look. :)


Some quick cell phone snaps I took before the concert. Sorry about the crap-quality. XD And I keep on getting these weird, purple lens flares. Oh well.

I used Stila Magnificent Metals Foil Finish eyeshadow in Metallic Emerald for a pop of shimmering color. The rest of the wing was created using Libertine and Black Dog from the Urban Decay Black Palette as well as a generic black gel eyeliner. For my lips, I used Jordana Matte lipstick in Berry topped with the gold end of Maybelline Flipstick Stunner and Stila lip gloss in Vanilla.


Hope everyone's having a fantastic Thursday! Thanks for reading! <3

Hugs,
Cat

Sunday, March 23, 2014

Navy & Gold Wings

Hi everyone! I'm enjoying my first, truly relaxing weekend in a long time, so I didn't really do anything very complicated in terms of makeup. I just thought I'd share a simple, navy and gold winged eyeliner look that I did today.


Whoops, forgot to number the pictorial. Lazy Sunday, indeed. So, I basically took some Ulta gel eyeliner in Ink and created a super-thick line on my lid. Then I made a flick at the end of the line and connected it to the primary line. Filling in that empty, little triangle of space completes the wing shape. Next, I outlined the wing in gold, using Maybelline Color Tattoo in Gold Rush. Then I took a little more gel eyeliner and lined my lower lash line. To finish, I curled my lashes, added a coat of mascara, and affixed a pair of Ardell Wispies. Nothing to it!

Well, the gold outline was a little challenging with the cream eyeshadow. I realized that I could have made things a lot easier by simply using gold liquid eyeliner…which I have. DUH! Oh well, lesson learned. XD

Happy Sunday, everyone and thanks for reading! <3

Hugs,
Cat

Saturday, September 22, 2012

Simple Shadow Stick Eyes

This is for my middle sister.  She's, like, the loveliest girl in the world.  However, unlike makeup-crazy me, she's so lazy about beauty that she barely likes brushing her hair, much less take the time to apply cosmetics to her face.  Well, we talked the other day about coming up with a super-simple makeup routine that she could stick with regularly.  I think I figured out the perfect look for her:


These just might be the easiest eyes I've come up with.  I used Urban Decay's Glide On Shadow Pencils in Rehab and Sin.  Rehab for the upper eyelid, and then Sin to highlight the brow arch and accentuate the lower lash line.  Add a dramatic black wing to the top lash line and she's done!  (I gave her my spare Marbella Eyeliner Pen, which I used here to draw my winged eyeliner)

Time to complete look: less than 10 minutes.

That's probably the hardest part.  She already has an Etude House Drawing Eyebrow Pencil of her own to refine her brow shape and a variety of BB creams to choose from as foundation.  I did suggest UD's Afterglow Glide On Cheek Tint in Quickie as blush, and then any tinted balm or gloss to finish off the lips.

For all you lazy daisies out there, I don't think it gets any simpler.  This look requires no brushes and is virtually mess-free.  It's a really convenient way to look polished while letting your natural beauty shine through.  A girl can walk out the door with this face for work or school, and then transition into a date or evening look by adding false lashes and a cute hairstyle.  All of these products fit inside a small makeup bag, which you can easily keep in your purse/backpack/messenger bag.  Also good for travel if you don't have a lot of room to spare for beauty supplies. :)

Steph, I hope you're reading this. *wink wink*

Hugs,
Cat

Monday, April 23, 2012

Hot Pink Dollipop Wings Video Tutorial

Hello hello!  I made this video a few weeks ago, but I've been having some problems editing it on YouTube.  Well, I've finally gotten it (almost) right so I guess it's good enough to share now. :D


Here you go!


Hope some of you find this helpful.  Happy Monday and enjoy!

Hugs,
Cat


Wednesday, April 4, 2012

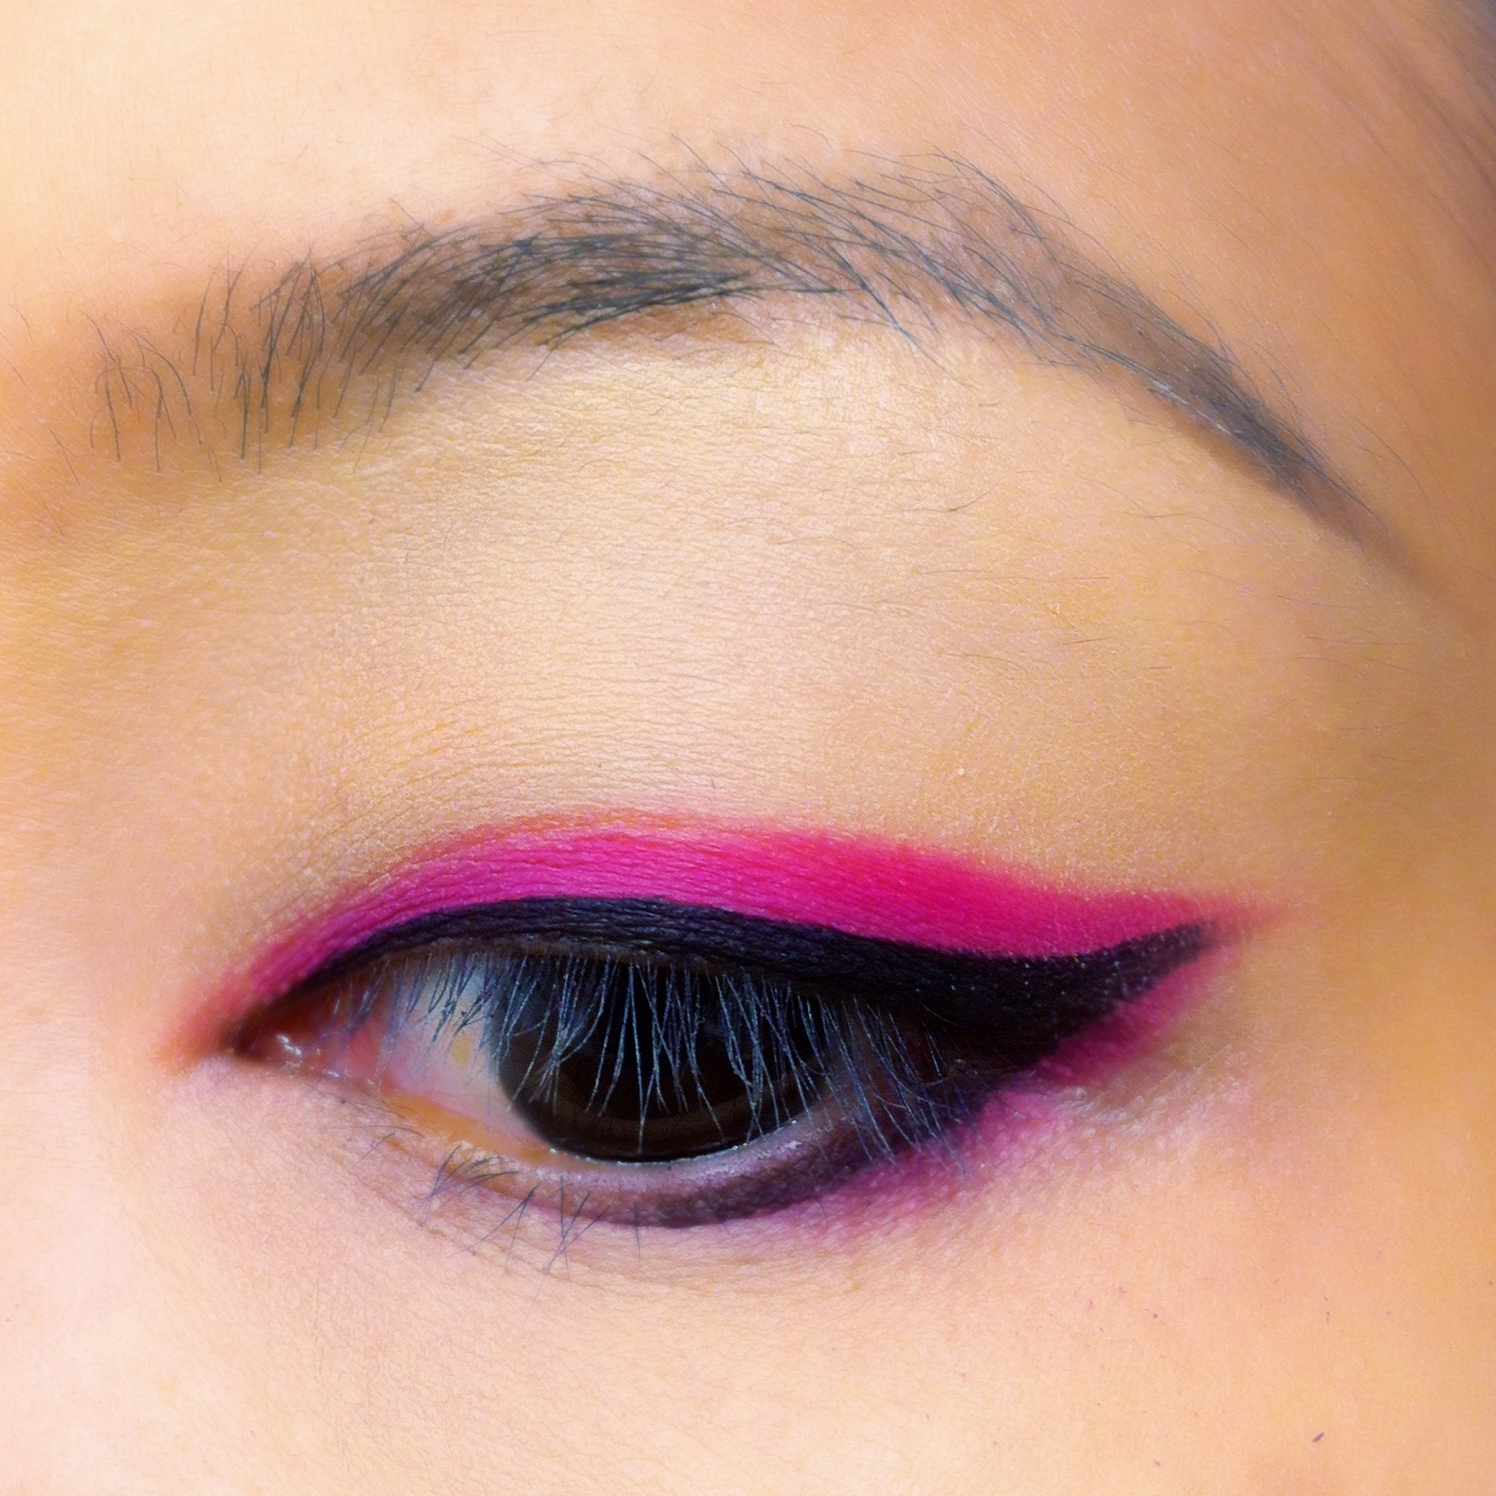
Pinky Wings

Hey you guys!  Quick and fun eyeshadow tutorial coming your way. :)  As I mentioned in my previous post, the new school quarter has started for me and I've been frazzled trying to get everything in order.  This means barely any time for makeup.  Yeah yeah, I know I have my go-to makeup for school days, but I've been thinking...I'm an art student for gosh sakes!  Shouldn't I be doing something colorful and creative to reflect my passion?  With that in mind, I came up with a way to make my makeup flashy in a flash!  Check it out:


 I've been wearing my eyes this way all week, in a variety of colors.  Hot pink is one of my favorites however, I've received the most compliments from this combo.

As always, start with a primed eye:


Next, using black gel/cream eyeliner, I'm going to draw a dramatic wing along my upper lash line:


Don't worry if it isn't too tidy.  We'll clean that up later.  Then, I'm going to line the outer corner of my lower lash line with the same gel liner:


Now's the fun part!  Let's add some color!  I'm going to grab some hot pink eyeshadow, here I'm using Sugarpill's Dollipop, and I'm going to trace along to top of my winged eyeliner:


I'm also going to add a little bit along the outer corner of my bottom lash line as well...just a touch, we want the wing to be the star, but this pulls the entire look together:


To wrap it up, I just refine my eyeliner using some liquid liner (which gives you sharp, crisp lines), curl lashes, and add mascara:


Tada!  Easy, colorful "Cat" eye. (lol)  Hope you found this useful and have fun with it!  Thanks for reading and have a great night!

Hugs,
Cat


Thursday, March 1, 2012

Tinting Eyeliner

Black has always been the undeniable go-to color for eyeliner.  But, for some of us, everyday black can equal everyday boring.  Ever wanted to wear colored eyeliner but: a) didn't want to pay for it, b) didn't see the point because you're not going to wear it that often anyway, or c) all of the above?  Well, for the frugal and/or the colored liner-shy, I'm going to show you a cheap trick on how you can tint your black eyeliner so that you can wear colored liner as little or as often as you'd like using products you already have so that you don't have to pay an extra penny.

First, I line my eyes as I normally would using black eyeliner.  My eyeliner of choice is gel/cream liner applied with a bent brush, but this will work with pencil or liquid as well:


Next, with a small smudge brush, I'm going to layer eyeshadow over the black eyeliner.  I'm going to use dark blue because I like it.  Also, it's a really great color for those who want to stray from black, but don't want to do so in a less-obvious manner.


Stay within the lines for a clean look, or smudge right outside of the lines for a softer, smoky-esque feel:


All done!  I went from jet-black liner to sapphire blue by just including one simple step and it didn't cost me a thing!  You can do this with pretty much any color in your shadow arsenal.  This would be so pretty with greens, purples, and fuchsias, don't you think?


Hope some of you get a chance to play around with this technique!  Have a great night! :D

Hugs,
Cat

p.s. For bolder colored liner, you can skip the black base and apply your pre-existing shadows wet as eyeliner.  I'll see about doing a tutorial for that one someday. :)

Tuesday, February 28, 2012

Winged Liner Technique

I'm sure this is nothing new, but just thought I'd do a post on a little trick I use to dramaticize and even out my winged eyeliner.


For the sake of visibility and clarity, I'm just going to apply very neutral shadow over my primed eyelid as a backdrop for the winged line:


With my Sonia Kashuk bent eyeliner brush and Maybelline Eye Studio black gel liner, I'm going to line my upper lash line.  I'm going to make mine moderate in thickness, but you can definitely go thicker or thinner to suit your own taste.


Notice that it's thinner towards the inner corner and gradually widens towards the outer corner.  Next, I'm going to create a little flick along my outer corner using an upward stroke.


The flick can be as long or as short as you'd like depending on how dramatic you want your wing to be. Now, I'm simply going to connect the tip of the flick to the rest of the eye line.  Sort of like connect the dots:


See how the wing is starting to take shape?  Now all we have to do is fill in the uncolored space with more black gel liner:


All done!  Wasn't that fun and easy?


Overall look:


Winged liner is my favorite way to define my eyes.  I have small, almond-shaped eyes, so I find that it's a very flattering way to accentuate my natural eye shape.  I like its effectiveness towards adding instant drama without requiring much else.  Hope some of you found this tutorial useful, and hopefully clear.  I was working on a video, but kind of flubbed it and have to re-film.  I'll see about getting it up as soon as I can, though I do have another midterm next week.  Ugh!  Thanks for reading tonight!

Hugs,
Cat

Tuesday, October 18, 2011

Teal Tease: cream eyeliner tutorial and ELF mini haul!

Hello!  So I finished my midterm (with some success, I hope) and finally have the chance to get a real post up.  I'm going to share my latest ELF mini haul as well as a YouTube tutorial on how to do this look using my new ELF Studio Cream Eyeliner in Teal Tease:


Funny story.  So there's this little bakery about 2 blocks away from my home that sells the most delicious little Parisian macarons I've ever tasted.  They look like this:

And they TASTE as good as they look!
Anyways, hubby and I had bought some together and put them in the fridge.  I had an errand to run and didn't come back home until later that evening.  When I got back, my delicious little macarons were *gasp* GONE!  Apparently, there was some miscommunication between hubby and I and he had thought I'd given him the go-ahead to eat every single one of my tasty little treats.  I was absolutely devastated.  (in addition to having an affinity for style and beauty, I'm probably one of the biggest gluttons you'll ever meet)  So, to compensate me for my loss, hubby bought me some ELF.  Well, that's one sure way to win the heart of this Cat! :D

Here's what I got:


Essential Shimmer Eyeliner in Iconic Ivory.  I haven't used it for a makeup look yet, but so far, I can tell you that it's soft, creamy, and has good opacity.  I imagine it would make a terrific eye-widener.


Studio Concealer Pencil and Brush in Light.  This is absolutely excellent for on-the-go blemish resolution.  The texture is creamy, the color is versatile, and the brush is super-soft and very high quality.    I actually used it prior to today's tutorial to refine my brow shape and highlight my brow arch.


Mineral Booster in Tinted.  I was afraid that my skin tone would be too dark for the Sheer color, so I got the Tinted shade with crossed fingers.  My first observation was that the color looked a little too pink.  However, upon application, it really blended nicely and gave me a smooth, even complexion with a soft, matte finish.  FYI, I'm wearing it in the tutorial.  I applied it over my usual CG Smoothers tinted moisturizer.  The powder is very fine and feels weightless on.  I have sensitive skin that's prone to breakouts when I use makeup that clogs pores, so I'll try using this continuously for a week and will update you all on the results.


Studio Blush in Twinkle Pink.  I love love love this color!  It's really more of a peachy, warm pink with super-fine champagne/gold glitter particles.  I love the gorgeous glow that I got from it, I can't imagine this color looking bad on anybody.  WARNING!  This blush is very loosely pressed, it seems, because there was a TON of fallout when I used it.  Just very gently tap your blush brush against it to pick up product.  This won't eliminate fallout, but will minimize it.  I'm also wearing Twinkle Pink in the tutorial.


Studio Cream Eyeliner in Teal Tease.  My favorite of the bunch and the star of the day.  It's a gorgeous, shimmery shade of deep teal.  The formula glides on very smoothly.  The opacity is just so-so, but build-able.  It takes a teeny, tiny bit of extra effort to get the color on evenly, but it's do-able and worth it, which I demonstrate in the video.  The color lasts and lasts for hours on end with little to no smudging, fading, or flaking.  I have been waiting for months to get my paws on this eyeliner because the color always sells out!  Totally worth the wait!

Ok, so here's my little video on how I created a simple, yet dramatic winged eyeliner look:


Overall look:


Additional Makeup Details

::Face::
CG Smoothers Aqua Tinted Moisturizer in Light to Medium
ELF Mineral Booster in Tinted

::Cheeks::
ELF Studio Blush in Twinkle Pink

::Lips::
Elf Studio Glitter Gloss in Twinkle Pink

I'm also very happy to announce that I'll be conducting Style By Cat's first giveaway.  The prize will be an ELF Professional 9 Piece Makeup Brush Set:


Saturday, September 17, 2011

Plum Passion and Grassy Green Shimmer Eyeliners

I woke up this morning and thought I'd do some quick eyeliner looks with a few of the ELF Essential Shimmer Eyeliners that I got in the other day.  Since I only have 2 eyes, I chose the Plum Passion and Grassy Green pencils.


I replicated the winged liner from yesterday's teal look and set the liners with matching eyeshadows from the ELF Studio Endless Eyes Pro Eyeshadow palette.  There was a purple and green shade in the palette that were perfect matches for the pencils.


All in all, they were fairly creamy and applied smoothly.  For some reason, the Grassy Green seemed to distribute color a little more evenly than the Plum Passion.  Either way, they both made for some simple and pretty looks.  Took me less than 5 minutes to do both eyes.


Don't forget to set the the liner with shadow!  It makes the colors bolder, long-lasting, and budge-proof!  Unfortunately, I have to remove this because I'm going to a party tonight, but it's been fun having different colors on each eye.  Lol.  Happy Saturday!

Hugs,
Cat