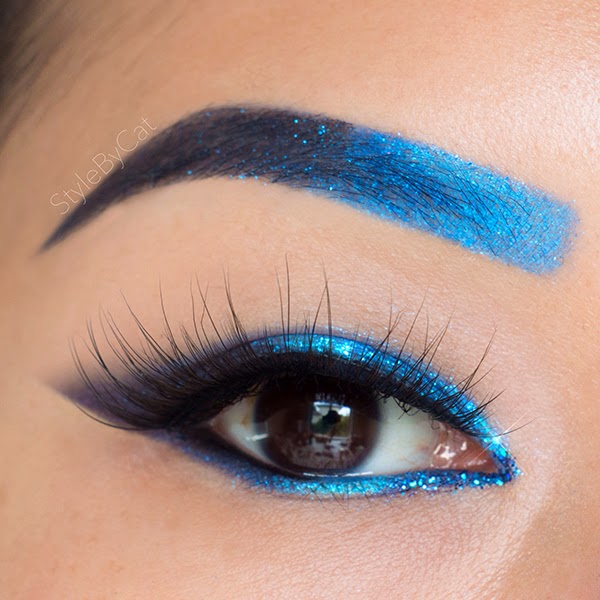
Showing posts with label asian makeup. Show all posts

Friday, November 28, 2014

Glittery Holiday Looks

Happy Black Friday, everyone! I was too busy with Thanksgiving to post yesterday, but have been cozily shopping on my laptop all day today, leaving me plenty of time to catch up on my blog absence. 

Anyhoo, glitters are trending for the holiday season (are they ever not?) and I've been busy creating some sparkly looks that are party-perfect!

Champagne Kisses by Violet Voss

Holy Grail by Violet Voss

Violet Voss  makes incredibly intense pigments, but their specialty is unique glitters with massive amounts of sparkle! They also sell a glitter glue primer, perfect for making your glitters stick and last all day, all night. They're in the midst of their Black Friday sale so don't miss out!

Hugs,
Cat

*This post contains commercial samples provided by the manufacturer for the purpose of review.

Thursday, November 6, 2014

Shimmery Cut Crease with Sephora Glitz & Glam Bag

Ok, so this is a somewhat weird, convoluted story, but I figured I'd tell it since it's related to the product in today's post. A couple months ago, I ordered Sephora's Glitz & Glam Party Essentials Sampler. 


You can't tell from the photo, but my package came severely damaged. First off, it took about 10 days for me to receive, which I thought was awfully slow in comparison to my usual packages. The box looked like someone had played soccer with it, and my bag was dirty and mangled, with a few of the products being broken. (the Stila Magnificent Metals shadow and the Benefit Watts Up)

Thankfully, Sephora has pretty good customer service so they gave me a full refund and told me to expect a visit from a UPS agent to investigate what may have happened. It's been over a month and no one showed up, so I figured it'd be ok to use the products by now.

Below is a shimmery, cut-crease I did using the Laura Mercier Rose Gold Caviar Stick, Stila Magnificent Metals in Dusty Rose, Benefit's Watts Up in the brow arch, and Lancome's Art Liner to line my upper lash line.


I think this turned out rather nice. Everyone else seemed to think so, also, as I got an unprecedented amount of good feedback on this look on my Instagram. :) Anyhoo, one more day away from the weekend! Happy Thursday, all and have a great evening!

Hugs,
Cat

Saturday, November 1, 2014

Ten Three Labs

Hiya! Hope everyone had a fun and safe Halloween yesterday! Speaking of the spook-tacular, I want to introduce you all to a super-cool, new indie cosmetic collection called Ten Three Labs. (10/03 also happens to be my bday, woo woo!)

Cara, the owner, makes and packages the products herself. I love that about small, independent operations. So much care is put into the creation and presentation. It's also very satisfying knowing that I'm getting a domestically-made product!


First of all, I was thoroughly charmed by the package design. It conjures up imagery of some magical, gothic/victorian apothecary. In addition to cosmetics, included in my package were whimsical little extras, such as candy, flower seeds, and a novelty, fortune-telling fish. (I always wanted one of those) It's the little things and attention to detail which makes me develop an affinity for certain brands.

The shadows are richly pigmented in a variety of deep, earthy colors to brights to pastels. The full-sized jars will probably last me a lifetime, while the generous sample bags will probably last for many, many applications. You're getting so much product for such a great price, this is seriously a steal!

I haven't tried the balms yet, but they look and smell wonderful. I'm sure I won't be disappointed, but I'll update you all on my experience with them once I get a chance to try them.

Here is a look I did with some of the shadows. Products listed below.


I did a soft, romantic look using a combination of pink and grey...one of my all-time, favorite color combos.

Products used:
  • Urban Decay Primer Potion in Eden
  • Etude House black gel eyeliner
  • Eyeko Making Eyes gel pencils in Dove Grey and Powder Pink
  • Ten Three Labs shadows in Shelley's Big Eye and Antoinette
  • Eyemimo Cosmetics eyelashes in GLM13
I love the way the pale pink looks on my lower lash line. I have small eyes and doing this creates a brightening, eye-opening effect!

Head on over to Ten Three Labs to check out Cara's wonderful, handmade beauty products! I highly recommend this brand.

Happy Saturday, all!

Hugs,
Cat

*This post contains commercial samples provided by the manufacturer for the purpose of review.


Wednesday, October 29, 2014

Lashes & Liner

Simple, black, ombre, cat eye liner to showcase Eazy Duz It mink lashes by Luxy Lash.


Eazy Duz It's crisscross design, volume, and length make them very dramatic lashes, yet they're incredibly lightweight, feels like I'm not wearing lashes at all! The liner design that I paired with these lashes is easy to do, yet looks very dramatic, requiring very few products. I'm considering making a tutorial/pictorial for it.

Products used:
  • Etude House Drawing Eye Brow Pencil in Dark Gray and gel eyeliner in Black
  • Sephora black pencil eyeliner
  • Kate Super Sharp liquid eyeliner pen in BK-1
  • Eazy Duz It mink lashes by Luxy Lash
Happy hump day everyone! :D

Hugs,
Cat

*This post contains commercial samples provided by the manufacturer for the purpose of review.

Friday, October 24, 2014

Eye Wear Lashes Co

TGIF everyone! I'm sure we're all ready and excited for the weekend!

Anyhoo, I'm excited to share a new brand of luxury lashes with you all! They're called Eye Wear Lashes and they make some really beautiful products. You can tell that a lot of care was taken into consideration from the product to the packaging.

The ethically sourced mink lashes are luxuriously dense while remaining graceful and lightweight. The unique, cylindrical packaging has a python texture with shiny, gold print and is secured with a thick, satin ribbon. I love that each lash is attached with a thin, plastic tab to make removal from the packaging easy and convenient.

Here is a simple, ombre cat eye that I did featuring a style called "Flawless".


Products used for this look:
  • Etude House eyebrow pencil in Dark Grey
  • Etude House gel eyeliner in Black
  • Urban Decay shadow in Blackout
  • Makeup Geek pigment in Utopia
  • Eye Wear Lashes Co mink lashes in Flawless
Hope everyone is having a fine Friday, so far! Until next time. :D

Hugs,
Cat

*This post contains commercial samples provided by the manufacturer for the purpose of review.

Wednesday, October 15, 2014

Rose Gold Glitter Cut Crease

Really quick post today! Just wanted to share a glittery cut crease that I did today. I chose a rose gold theme and Eye Kandy Cosmetics had the perfect color for my look: Taffy. I used the "fine" texture as opposed to the "superfine" to get as much sparkle as possible. This is a fantastic look for autumn due to the warm, rosy hue. Also good for fall/winter weddings for brides that are more dramatically inclined.

I also played around with a fake, dramatic brow by filling in my brows with L'Oreal Lacquer Liner in Bronze and then sketching in brow hairs using Eyeko Visual Eyes liquid pen liner in Mocha.


Products used:

  • L'Oreal Lacquer gel liner in Bronze and Eyeko Visual Eyes eyeliner in Mocha for brows
  • Urban Decay Primer Potion in Eden
  • L'Oreal Lacquer gel liner in Bronze and Urban Decay Naked 3 in the crease as well as lower lid
  • Eye Kandy Cosmetics Taffy glitter (fine "F" texture) on the lid as well as a matching shade of rose gold from Naked 3
  • Eyeko Eye Do eyeliner
  • Luxy Lash "Woke Up Like This" eyelashes
I don't have a video tutorial for a cut crease at the moment, but if you'd like to see one and can't wait, I would recommend JLINHH and Glam&Gore on YouTube.

Happy hump day and thanks for reading!

Hugs,
Cat

Monday, October 13, 2014

Princess Jasmine Mint & Gold

So, this was just supposed to be a mint and gold glitter cut crease look, but a few of my Instagrammers mentioned that it looks like a Princess Jasmine inspired look. I completely agree, so, here it is!


Products used for this look:
  • Etude House Drawing Eye Brow pencil in Dark Grey
  • Urban Decay Primer Potion in Eden
  • Urban Decay Naked palette, Eldorado liquid liner, and Midnight Cowboy glitter liner in the crease
  • Royal Care Cosmetics gel eyeliner in Mermaid Green
  • Siren Cosmetics pigment in Heartbreaker
  • Eyeko Eye Do eyeliner in Black
  • ColourPop eyeshadow in Get Lucky on the lower lash line
  • Born Pretty eyelashes in 13523
I guess I'll put this in the Halloween makeup inspiration as well! Hope everyone's start of the week is going well. Thanks for reading and stay tuned for the next post! <3

Hugs,
Cat

Saturday, October 11, 2014

Teal Glitter Ombre Heart Eyeliner

Well, that's a mouthful, but it is what it is.

I've been spending a bunch of time on Instagram and Pinterest and get so inspired by all sorts of makeup looks. Awhile back, I saw a makeup artist mask out a little heart in her eyeliner which I think is charming and whimsical as heck! I've been masking shapes into my makeup from time to time, since.


The shape-making is easier than it looks. I purchased a bunch of nail decals from a shop called Beyond The Nail. I strategically place the decals on my eyelid, apply makeup, and then use tweezers to carefully peel off the decal once I'm finished. Voila! Cute little cutouts in your makeup!

Products used for this look:
  • Etude House Drawing Eye Brow pencil in Dark Grey
  • Urban Decay Primer Potion in Eden
  • Eyeko Eye Do eyeliner in Black, Visual Eyes eyeliner in Marine, and Making Eyes eyeliner in Blue Teal
  • ColourPop eyeshadow in Get Lucky on the lower lash line
  • Siren Cosmetics pigment in Europa
  • Eyekandy Cosmetics glitter in Spearmint
  • Eyemimo GLM13 eyelashes
Hope everyone is having a fantastic Saturday! As always, thanks for reading! <3

Hugs,
Cat

Tuesday, August 12, 2014

Bargain Beauty: Born Pretty Store

Hi everyone! I wanted to share some awesome, frugal finds that I received from Born Pretty Store, a one-stop online shop for all your beauty needs! They offer a fantastic variety of beauty items at unbeatable prices. They were also kind enough to supply me with an offer code for 10% off your entire order, plus free shipping worldwide! (Code: CATH10)

Here are some of my picks:


Mink lashes are all the rage right now and are definitely not cheap. Be prepared to pay up to $50 a pair. Unless you're shopping at Born Pretty Store. Then they'll run you about $7. These were my favorite model that were available. They're lightweight and natural-looking. Syle number is #14245.


I know there are those with qualms about the ethics regarding mink eyelashes and I completely understand. These long, elegant lashes are a great alternative for the wispy, tapered mink look. They're synthetic, so no minks were involved in the making of these. What's better, they're only $8 for 5 pairs! Style #13523


It's hard to find a good, red lipstick that works well with my golden undertones, but this spicy, tomato-red had just the right amount of warmth to suit my complexion. The formula is smooth, pigmented, and lightweight with a long-lasting, matte finish without being drying. Lasted me a good 7 hours with some moderate fading. The packaging is super-cute and the overall lipstick is pretty good quality for just under $8 a tube. The brand is Hot Shop, color #7.

Born Pretty Store is a fun place to shop...they have so much stuff for such great prices! They're located overseas, so expect a 2 week shipping window. Totally worth it if you're not in a hurry and would like to save some money! And remember, use code CATH10 for 10% off plus free worldwide shipping!

Hope you guys enjoyed today's review! I've got tons of new products in to share, so stay tuned for upcoming posts!

Hugs,
Cat

*This post contains commercial samples provided by the manufacturer for the purpose of review.

Saturday, August 9, 2014

I'm Alive

Haha, hello everyone. Oops, looks like I've been away for a bit. Long story short, I was busy with school, I graduated, and now I'm currently on the job hunt. This leaves little time for making videos and contributing to my blogs (I'm sure some of you are aware that I'm on www.AsianceMagazine.com, also)

I've been pretty active on Instagram because it's the easiest to maintain...snap a picture and write a short caption. No one has time for essays there. Lol. I do miss writing, however, and I'll try to be back a few times a week. While posting photos on Instagram is a lot of fun, I really miss writing out tips and tricks for makeup as well as comprehensive reviews for new products. Which reminds me to announce that, since building a moderate following on Instagram, I've had the good fortune to acquire some cosmetic sponsors these days who send me fantastic items to review, so I definitely look forward to catching you all up on some of my latest finds! :D

Anyways, here's a glimpse of some of the stuff you guys have been missing, in case you're not following me on Instagram:


As you can see, I've become rather adept at making faces. I look forward to blogging once again. Thanks for continuing to follow and stay posted for future articles on new products and new makeup techniques!

Hugs,
Cat

Wednesday, April 2, 2014

Divergent Makeup Series: Abnegation

Third installation of my Divergent Makeup Series: Abnegation. (are you guys sick of these yet? lol) For those of you who are familiar with the series, Abnegation faction members would be fervently against makeup. So this look, in itself, doesn't really make any sense. But I'm basing this solely on the faction color, therefore, in that regard, it makes a bit of sense. :)


Products/Instructions:

  1. blend Urban Decay Gunmetal eyeshadow into the crease
  2. apply Sugarpill Tako to the inner corner
  3. apply Sleek Ultra Mattes V2 grey to the outer corners
  4. line upper and lower lash lines with Ulta Eye Crayon in Black Tie
  5. set lower liner with Sleek Ultra Matte V2 grey
  6. darken outer corner with Sleek Ultra Matte V2 black
Finish by applying Ardell #120 lashes.

Keeping it brief today because there's much to be done, but hope you all enjoyed this post anyway. Stay tuned for the rest of the series! :D

Hugs,
Cat

Monday, March 31, 2014

Divergent Makeup Series: Erudite

Hey, guys! So, you know that Divergent is a film out in theatres right now. I haven't seen it, but I was curious about it because many people compared the story to the Hunger Games series, which I've read and enjoyed. I decided to check out the Divergent series by reading it, first. I'm not sure whether or not I'll see the film.  I've gotten through the first book. It's not bad. I'm waiting for the other two to come in from Amazon before I have an opinion on the entire series. Anyhoo, back to makeup. The population in the Divergent series is divided into 5 factions. This inspired me to do a makeup series based on each faction. It's only for fun and it's my own, personal creative interpretation. I don't think there's much of a deeper meaning in my looks other than tying in the correct color to the correct faction. :P For the first in the series, I chose to do Erudite.


The primary color that represents Erudite is blue. Therefore I did a smoked out eye with a soft wing and added a pop of blue in the center. Interpret the smoke any way you wish…maybe manipulation or deception. (hope I'm not giving too much away)


Products/Instructions:
  1. apply Ulta Eye Crayon in Black Tie to inner and outer corners of lid
  2. layer matte black eyeshadow (I used Black Dog from UD's Black Palette) over pencil eyeliner
  3. apply Sephora automatic eyeliner pencil in Blue to center of lid
  4. layer Sugarpill eyeshadow in Velocity over blue eyeliner in center of lid
  5. blend blue-black shadow (I used Sabbath from UD's Black Palette) into crease
  6. use more matte black shadow to create a soft, wing shape on the outer corners
  7. line lower lash line with Black Tie
  8. set lower liner with blue-black eyeshadow (Sabbath)
To finish the look, curl lashes, apply mascara, and apply Ardell Wispies eyelashes.

Hope you guys enjoyed today's Divergent eyeshadow tutorial. I'll concentrate on bringing tutorials of the other factions in the coming week or so. I'm so excited to do them all! (I'm such a book nerd.)

Hugs,
Cat


Friday, March 28, 2014

Simple Stila Sunset Eyes

Caught an icky bug the other day, most likely from a crowded, public space I was wandering around when I was in the city. Unfortunately, it looks like I'll be spending the rest of my spring break bed-ridden. Therefore, today's makeup tutorial isn't terribly complex. But, sometimes simple is best.


The primary ingredients for this look are 3 pressed shadows from Stila (Pigalle, Copper, and Azure), Maybelline Color Tattoo in Fierce & Tangy, Ulta brand Eye Crayon in Dark Denim, and Ardell #120 eyelashes.


Instructions:

  1. blend Pigalle into or, in my case, above the crease
  2. apply Fierce & Tangy to the lid as a base
  3. layer Copper over Fierce & Tangy
  4. line lower lash line with Dark Denim pencil eyeliner
  5. set liner with Azure
  6. line upper lash line using the same line-and-set method
  7. curl lashes, apply mascara, and affix Ardell #120 eyelashes
I was really surprised with how pigmented, blendable, and vibrant these Stila eyeshadow are. I received a Stila gift set years ago that came with a shadow palette. They were possibly the worst shadows I'd ever used, barely pigmented and I couldn't blend them to save my life, the texture was atrocious! I'm really glad I've given them another chance, since. Good stuff!

Well, have a great weekend everyone, and thanks for reading! I'm going to go recuperate now. -_- Hopefully I'll have something interesting up before the weekend is out. :)

No hugs today, don't want to give anyone my cooties!

Cat

Thursday, March 27, 2014

Epic Metallic Emerald Wings with Stila Magnificent Metals

Here's a look I did for a Kraftwerk concert I attended a couple nights ago. I figured, since it's a concert, I could get away with a less-than-conventional look. :)


Some quick cell phone snaps I took before the concert. Sorry about the crap-quality. XD And I keep on getting these weird, purple lens flares. Oh well.

I used Stila Magnificent Metals Foil Finish eyeshadow in Metallic Emerald for a pop of shimmering color. The rest of the wing was created using Libertine and Black Dog from the Urban Decay Black Palette as well as a generic black gel eyeliner. For my lips, I used Jordana Matte lipstick in Berry topped with the gold end of Maybelline Flipstick Stunner and Stila lip gloss in Vanilla.


Hope everyone's having a fantastic Thursday! Thanks for reading! <3

Hugs,
Cat

Monday, March 24, 2014

Metallic Bronze Gradient Cat Eye Tutorial

I'm really having fun making these pictorial tutorials and seems like everyone else is enjoying them, too. :) So, here is yet another. I'm just so in love with my Stila Magnificent Metals Foil Finish eyeshadow, especially the Comex Gold…it's such a vibrant shade of molten gold! Here I've created a sparkling gradient cat eye with warm, bronze tones with the help of Urban Decay's Naked and Naked 3.


Product/instructions:
  1. Line upper lash line and draw a flick along the edge as a containment guide for the cat eye using UD pencil eyeliner in Corrupt.
  2. Apply UD Darkhorse from the Naked palette to the center of lid.
  3. Shape wing using Blackheart from UD's Naked 3 palette.
  4. Blend Smog (Naked palette) from the center of lid towards the inner corner to create a gradient.
  5. Apply Stila Magnificent Metals in Comex Gold to the inner corner and extend towards the center of lid.
  6. Clean up shape with concealer.
  7. Line lower lash line with UD eyeliner pencil in Zero.
  8. Accent lower liner with Blackheart.
Finish by curling lashes, applying mascara, and affixing Ardell lashes in #120.

I look forward to doing more full-face and creative looks in the coming days. Stay posted and thanks for reading! :)

Hugs,
Cat

Sunday, March 23, 2014

Navy & Gold Wings

Hi everyone! I'm enjoying my first, truly relaxing weekend in a long time, so I didn't really do anything very complicated in terms of makeup. I just thought I'd share a simple, navy and gold winged eyeliner look that I did today.


Whoops, forgot to number the pictorial. Lazy Sunday, indeed. So, I basically took some Ulta gel eyeliner in Ink and created a super-thick line on my lid. Then I made a flick at the end of the line and connected it to the primary line. Filling in that empty, little triangle of space completes the wing shape. Next, I outlined the wing in gold, using Maybelline Color Tattoo in Gold Rush. Then I took a little more gel eyeliner and lined my lower lash line. To finish, I curled my lashes, added a coat of mascara, and affixed a pair of Ardell Wispies. Nothing to it!

Well, the gold outline was a little challenging with the cream eyeshadow. I realized that I could have made things a lot easier by simply using gold liquid eyeliner…which I have. DUH! Oh well, lesson learned. XD

Happy Sunday, everyone and thanks for reading! <3

Hugs,
Cat

Friday, March 21, 2014

Spring Makeup Video Tutorial

Hi, everyone! So, for the start of spring break, I've got a new video tutorial up on a spring makeup look! Please give it a watch. :D


Thanks for reading, and watching! TGIF! <3

Hugs,
Cat

Wednesday, March 19, 2014

Easy Emerald Eyes with Stila Magnificent Metals

Almost done with finals and then I can go back to making higher quality video tutorials and full-face looks! Anyhoo, more Stila Magnificent Metals Foil Finish shadows arrived on my doorstep today, Metallic Emerald being one of them. I was simply too excited and started playing with it right away. Here's what I did!


Products/Instructions:

  1. As always, begin with a primed eye and apply green eyeshadow to the inner and outer corners of your eyelid. I used the green shade from my Sleek Ultra Mattes V2 palette.
  2. Apply Stila MMFF in Metallic Emerald to the center of the lid.
  3. I'm really digging the soft eyeliner look these days. (foolproof) So I lined my upper and lower lash lines with a black pencil.
  4. Accent lower liner with more green eyeshadow.
  5. Darken outer corners with UD eyeshadow in Libertine.
To finish, curl lashes, apply mascara, and strip lashes, if you like. I'm wearing Ardell Natural Lashes in #106

Aren't these shadows gorgeously sparkly? (Well, ok, I did manually add that last little sparkle to make a point. XD) I'm so addicted! They're a little on the pricey side, $32 each, but coupon codes always pop up now and then, so keep an eye out!

Welps, one more final to go and I'm FREE…for a week. XD Happy Hump Day, y'all and thanks for reading!

Hugs,
Cat


Wednesday, March 5, 2014

Chrissy Teigen Inspired Makeup

Ok, so we can't all be born looking incomparably gorgeous like Chrissy Teigen or live her incredibly charmed life - Hello! Making $$$$ off of your good looks and being married to John Legend, to boot! However, I CAN steal her makeup. That's the best li'l ol' me can do. Anyhoo, I suddenly felt the urge to recreate a celebrity look the other night and Chrissy came to mind. Being half Thai, she and I sort of share a southeast Asian background. Also, our coloring and facial structures are similar enough that I figured I could make something work. I came across a fabulous red carpet image of her while browsing Google and knew it was the one. I just adore this glowing, golden look with a warm, smokey eye. How do you think I did?


Haha, I don't think I'm any closer to looking like her, but I do think that this color scheme is pretty flattering on my complexion. I'm a little yellower than Chrissy and wasn't as heavy-handed on the blush as her makeup artist. Overall, I like the way it turned out. Here is a close up of the eyes, created with the original UD Naked palette.


I went a little heavier on the highlight and contour than with my normal makeup. I definitely don't see myself going out every day like this, but heavier makeup does look wonderful in photos. I think I'll reserve this look for special occasions.


Isn't it amazing what good lighting and makeup can do? I did not use ANY filters for these images. Anyhoo, thanks for reading and hope you guys enjoyed this post. Happy hump day, until next time! :)

Hugs,
Cat

Monday, February 24, 2014

My Beauty Addiction HD Lip Paints

Vibrant lipsticks are so fun to play with! I especially covet the more eccentric colors. Unfortunately, lipsticks in more unusual shades, such as blues and greens, tend to be on the pricier side. Companies such as Lime Crime and Melt make beautiful, unconventionally colored lip products, but at $15 - $20 apiece, an offbeat collection of lip colors can quickly empty your pockets.

Anyways, I was browsing some indie makeup brands on Etsy when I came across My Beauty Addiction, or MBA Cosmetics. I was on a mission for cosmetic glitter, but noticed that they offered a product called HD Lip Paints. Sounds pretty intense, right? I was excited to see that they had such a huge variety of vibrant shades. They're also very reasonably priced and come in full-sized tubes or petite tubes, depending on how much you want to spend and how much you want to commit to a certain color. That, in itself, is pretty darn cool! 

I decided to try out three shades: Grape Crush, Hypnotic, and Indigo.
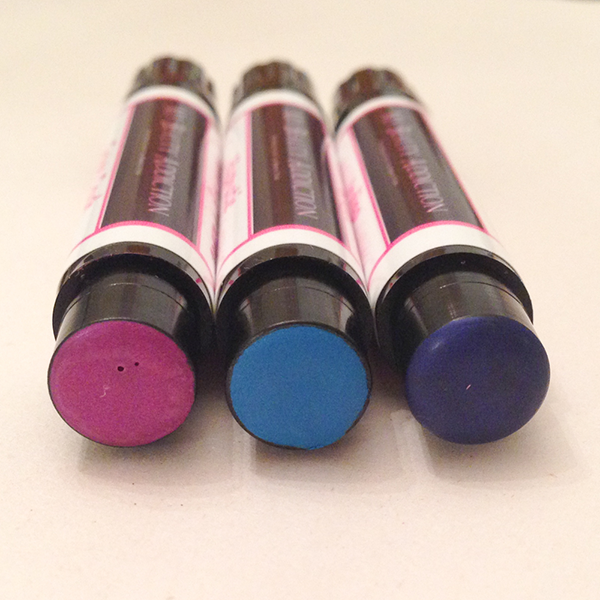

Petite, slim tubes. Grape Crush, Hypnotic, Indigo.

At $5 apiece, I'm pretty happy with them. Grape Crush looks pinker in photos for some reason, but it's a very pretty shade of violet and is probably the most "normal" of the colors I selected. Hypnotic is the most intensely opaque of the three. I'd consider it a good alternative to Lime Crime's No She Didn't if you don't feel like dropping $18. All colors are fairly faithful in real life to the on-screen representation from the company's site. It's pretty trippy seeing Indigo on in person, beautiful color, though a little more challenging than the other two to apply in an even coat. 

Still, I'm tempted to pick up the yellow and some of the greens, as well, from their collection. The formula is incredibly creamy and not at all drying like many opaque lipsticks. Removing Grape Crush and Hypnotic wasn't really a problem and Indigo wasn't so bad, though it did leave a raspberry-colored stain. I can't really tell you much in terms of wear. I sort of swatched, photographed, and removed since I was going out and these didn't seem appropriate for the occasion.

Anyhoo, here are the full-faced looks with these lipsticks so you get an idea of the overall effect:


Pretty groovy, right? The late afternoon window lighting makes my skin appear a little cooler than it normally would. That or the eccentric colors from the lipsticks threw off the white balance, I'm not sure. But you get the idea.

Alrighty, well, happy Monday, everyone! This was an especially fun post to do and I hope you guys enjoyed it! :D

Hugs,
Cat