Showing posts with label nail art. Show all posts

Sunday, November 30, 2014

Zoya: Black and Silver Chevron Nails

Since I'm all about glitter right now, I wanted to share the nail art that I wore to my family's annual Thanksgiving get-together this year.


I used Storm (black with sparkle) and Cosmo (silver glitter) to do this. I wish I could remember what the white polish is...but I lost the bottle shortly after I did the look. I have no idea how that happened! It was just a generic, opaque white from the drugstore. I remember paying less than $3 for it. I didn't use any stencils, just freehanded the design using a technique I learned from @gabbysnailart on Instagram. ^_^

I think this would look really pretty in black and gold to ring in the new year or in red and gold for Christmas, don't you think?

Anyhoo, thanks for reading and have a good night!

Hugs,
Cat

Saturday, October 25, 2014

Nude & Gold Glitter Mani

Heading out for the first Saturday night in a long time, so I did a nude mani with some gold, glittery tips. I love nude polish, it's so clean, classy, and versatile. However, I gave them a bit of a glam twist by adding a gold, glitter gradient. Ta-da! Easy peasy. Used the same technique as I did with the Halloween Disco Nails. Pretty much the only mani that I know how to do, but I like it!


Products used:
  • Seche Clear base coat
  • Zoya Shay polish (nude with subtle shimmer and a hint of pink)
  • Sally Hansen Insta-Dri polish in Go For Gold
  • Wet N Wild Mega Rocks polish in Waiting For My Solo
  • Seche Vite top coat
Happy Saturday, all!

Hugs,
Cat

Wednesday, October 22, 2014

Navy Blue and Teal Glitter Mani

I call this one the Midnight Sorceress! :D I know I've been sharing a lot of Halloween-inspired makeup, so I wanted to add some festive nail designs in the mix as well.


This is pretty much the same technique that I use for my other glitter gradients. See my Halloween Disco Nails tutorial.  However, the lighter part of the gradient begins at the cuticle of the nail as opposed to the tips.

Products used:
  • Revlon Moon Candy polish in Galactic
  • Orly nail polish in It's Up To Blue
  • Wet N Wild Mega Rocks polish in Slap The Bass
More Halloween-inspired nail looks to come, so stay tuned!

Hugs,
Cat

Tuesday, October 14, 2014

Halloween Disco Nails!

Cosmetics are my cup of tea, but I also dabble in nail art, occasionally. That is, I either can paint my nails one color OR I sometimes do this gradient glitter thing that looks pretty impressive for how easy it is to do. You just need a little time and patience, but it's not that difficult at all.

Since Halloween is coming up, I decided to go for a fun, glittery party look that is still in the spirit of the holiday, but not too over-the-top.


Products used:
  • Seche Clear base coat
  • Julep polishes in Jet (black) and Tatiana (sparkly pumpkin) from my recent Julep beauty box
  • Wet N Wild Megarocks glitter polish in Waiting For My Solo
  • Seche Vite Top Coat


Technique:
  1. Starting with dry, clean nails, apply base coat.
  2. Next, apply 1-2 coats of black nail polish.
  3. Apply 1 coat of Seche Vite and let dry.
  4. Using a cheap, makeup sponge wedge, sponge the orange polish onto half of nail. Make sure the application is heaviest at the tip and fades out towards the center.
  5. Apply the glitter polish to the tips and dot glitter bits sparingly no further than center of nail in order to achieve the gradient look.
  6. (optional step) Put a generous drop of glitter polish onto a piece of wax paper. Using a toothpick, carefully pick up bits of glitter and strategically place onto nails in order to suit your design.
  7. Finish with another coat of Seche Vite.
Since you all now know how to do this, you can pretty much do it in any color! :D I hope these instructions were clear! I'm considering a video tutorial in the future. Just have to find the time! Thanks for reading and for putting up with al my Halloween-inspired posts! lol

Hugs,
Cat

Saturday, January 25, 2014

Sparkly Mint & Gold French Mani

Happy Saturday, all! No TGIF shenanigans for me last night, just worked on some video and pictorial tutorial editing for StyleByCat's blog and YouTube (filming has been exciting, I recently upgraded my camera!). Anyhoo, I needed a break from having my eyes glued to the screen and opted for a DIY mani. Check it out!


Ok, so, I'm no nail art master or anything. (there are some pretty ridiculously talented DIY manicurists out there, holy moly!) However, I thought I did a fairly decent job. *patting myself on the back* My favorite color combo of all time (uh, at the moment, anyway) is mint, gold, and white. I whipped this up in my head and hoped to execute it in real life…turned out nicer than I thought it would!

Ok, so here's the cast:


  • Essie nail polish in Mint Candy Apple
  • Ulta nail polish in Diva
  • Nubar nail art pens in White and Gold
These Nubar nail art pens are pretty darn cool! I learned about them through my sis. When you twist off the top, you get a fine brush that's great for striping. When you pull off the cap (which can be darned difficult…I suggest you get an assistant to help you if your nails aren't dry) you get a fine, squeezy tip that's good for doing dots and things.


To achieve this look, I began by applying a base coat. Next, I applied 2 coats of Mint Candy Apple. Next, I brushed on Diva. Using the brush end of my nail art pens, I painted on white tips and then accented them with a gold stripe. I finished by topping with a coat of Seche Vite.

In retrospect, I think I should have applied the glitter polish right before the Seche Vite, as glitter acts as a sort of polish armor and probably would preserve my tidy little tips more efficiently. That's ok, next time!

Heehee, I can't stop staring at my nails! I can't wait to try out more manis with these cool nail art pens! Anyways, thanks for reading and have a fantastic weekend!

Hugs,
Cat

Friday, July 5, 2013

Are you Gelish?

One of my favorite ways to relax is to get a pampering mani-pedi. So, a few days ago, I went to a fantastic nail spa located in Oakland called Aveida. For those of you who may live in the area, it's a beautiful, relaxing space with friendly and skilled technicians. They also offer complimentary beverages, such as water, wine, tea, hot cocoa, etc., which I find to be a nice touch. For the month of July, they're running a Yelp check-in special: when you purchase a spa pedicure, you get a free manicure!

This is very exciting. What's more exciting, however, is that I decided to get an upgrade for a Gelish manicure. What is Gelish? It's a gel-based nail polish that takes only seconds to completely dry under LED or UV lighting when applied and remains perfectly glossy and chip-free for anywhere between 2-4 weeks.


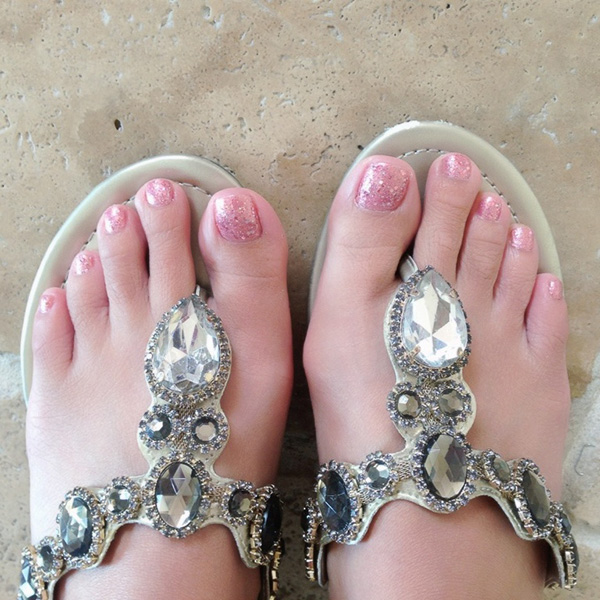
Whoo hoo! Sparkly pink tips! I believe this glittery shade is called June Bride #01353. The ladies at Aveida were kind enough to color match regular polish for my toes as well:


Happy hands and feet! And happy Friday to everyone, too. Enjoy your weekend and thanks for reading!

Hugs,
Cat