Wednesday, June 29, 2011

Makeup Tutorial: Bubblegum POP!

I'm so excited about my new blue liquid and glitter eyeliners that I just couldn't wait to feature them in another post.  I've been experimenting with some bright looks and came up with this one.  Ever since Disney's Sleeping Beauty, I've always liked the combination of bright pink and blue.  I test drove this look while shopping at the mall and got some nice compliments so I decided that we'd do a tutorial, yay!

As usual, I start with primed eyelids:

Urban Decay Primer Potion in Eden

For this look, I only use 2 shadow colors: bright pink and dark blue from my ELF 100 colors palette.


I begin by applying the bright pink shade to my upper eyelid:


Next, I line my top and bottom lash lines with blue eyeliner, which acts like a primer to brighten and stabilize the blue shadow:

CoverGirl LiquiLine Blast in Blue Boom

Then I layer the dark blue shadow over the liner, smudging and blending to soften the edges:


I also add a little more pink along the outer edge of the bottom blue shadow:


Next, I draw a wing on my upper lid as well as enhancing the outer corner of the bottom lid with liquid liner .

Sephora Collection Long Lasting Eyeliner in Navy Black
Then I emphasize my top lid wing by layering glitter liner over it.

Sephora Collection Glitter Eyeliner in Teal
I'm really frustrated that you can't see how sparkly and shimmery the glitter is in photos.  It catches the light so prettily in real life!  The teal glitter also adapts easily to different shades of blue, so it's really versatile.  I'm sure it works great with greens too!  It really stings when I apply it though. :(  In order to speed up the drying process and to decrease the sting, I set my hairdryer to "low" and blow dry my eyelids.  Strange, I know, but it helps.

Add mascara and I'm done!


Someone had asked me about eyeshadow that stands out while wearing glasses.  I immediately thought of this look.  It's much brighter in real life than in photos and I assure you that it packs a massive punch, even behind a pair of glasses.  Just to demonstrate, here's a picture of me rocking Bubblegum POP with my glasses on:

growing out my bangs = awkward hair phase
With or without glasses, this look is sure to garner plenty of attention!  Have fun trying it out!

Hugs,
Cat

Monday, June 27, 2011

Double Product Review and Tutorial: Sephora Glitter Eyeliner and Long Lasting Eyeliner

Alright folks, since I've been sooooooooo behind on my posts, I've decided to do a 3-for-1 today.  We have a tutorial PLUS a double product review so I'm aiming for something fun, productive, and informative!

I'm going to do a bronze and blue look accented with teal glitter, using some products I already own and featuring 2 new eyeliners from Sephora's own collection.  So let's start with a primed eye:

Urban Decay Primer Potion in Eden


I'm going to use this very old and outdated Urban Decay palette that was a hand-me-down from my sister a few years ago.  I still think they make these colors, but I don't think this exact palette is available any longer.  The colors I'll be using have check marks next to them:

Chopper, Smog, and Shattered

I'm going to start by applying Chopper, a glittery golden bronze shade, to my eyelid.


Next, I'm going to blend Smog, a shimmery medium brown shade, to the outer corner of my upper eyelid.


Once I've completed this step, I'm going to line my upper and lower lid lines with bright blue eyeliner.

CoverGirl LiquiLine Blast in Blue Boom

Using Shattered, a medium teal shade with a hint of golden shimmer, I'm going to layer over the eyeliner.


Here comes our new product test.  I'm going to use Sephora's Long Lasting Eyeliner in Navy Black to line my top and bottom lash lines.

Navy Black is a deep, shimmery blue that can be a great alternative to using plain ol' black.  It's dark enough to be a good black substitute, but has enough to color to give you a more interesting look.  It has a finely pointed, but soft felt tip and long handle which is very good for precision lining.  The formula is smooth and the color is pigmented.  I was easily able to make a nice wing for the top lid line and add a touch of color to the outer corner of my bottom lid line.  It's also long-lasting as described.  I would say it's a pretty good buy for $10.

Note: the color was darker in person than on camera

New product #2: Sephora's Glitter Eyeliner in Teal.  


 The glitter liner is a clear gel packed with glitter particles.  I used it to accent my winged liner on my top lid line.


Unfortunately, it doesn't show well in photographs at all.  However, it's super pretty and sparkly in person, so don't be fooed!  I really love it.  The salesgirl at Sephora told me that Urban Decay sells a similar product for $18.  She suggested the Sephora brand because a.) it wears longer.  b.) you get twice as much product.  c.) it's only $12.  That's too tough to say no to, I was sold!  My only gripe about it is that it stings for a few seconds following application.  Not sure why, but I like the look too much to stop using it, so I guess I'll keep using it until it gets recalled or I go blind.  Whichever comes first.

Add mascara and I'm done!
Here's the *somewhat* finished look.  I was just too lazy to wait to finish hair, but I guess this will do.


Have fun trying out the products and look and Happy Monday!

Hugs,
Cat

Saturday, June 25, 2011

Casual Summer Style by Victoria's Secret

So summer has finally come around and I've been more than happy to be rid of all my chunky, layered, winter clothes.  One thing I've been stuck with, however, are my fleece sweatpants from Hollister.  Don't get me wrong, they look and feel great!  Since joining The Bar Method workout studio, I've been wearing them to class.  The problem is, working out wearing fleece sweatpants in 80+ degree weather is no fun.  I found the solution to that problem while browsing the yoga wear section in a Victoria's Secret catalogue:


These cropped yoga leggings are fantastic!  They look and feel great on.  The waistline is not too low, but not too high, giving you the appearance of a flat stomach.  The material is comfy, yet firm and stretchy, tucking and slimming in all the right places to give the illusion that you have a nice booty and toned legs.  You can purchase them 2/$50 here: Yoga Crop Leggings  I like them so much that I wear them outside of the exercise studio as well.  They're casual, yet fashionable with heels and a long-length tank, tee, or tunic.

Oooh, and then I got me two pairs of these guys:


Best flip flops ever!  I've been buying these for years.  They have a dainty, contoured shape, which differentiates them from flat, basic flip flops.  There's a bit of a wedge heel, which makes them more feminine.  Also, the little bit of lift makes your calves and butt look really good while elongating the shape of your legs.  They're super-duper comfy as well.  The straps and footbed and nice a cushy.  I can walk in them for miles and I literally have!  The only thing is that I need to buy new ones every year.  They're foam, so they don't last much longer than a year of wear and tear.  I got them in white and navy.  White looks great, but gets dirty real fast.  I'd snatch them up ASAP.  They just went on sale from 2/$30 to $6.99 a pair.  Get yours here: Double Strap Flip Flop

Tuesday, June 21, 2011

Product Review: Maybelline Lasting Drama By EyeStudio Gel Eyeliner

Sorry I've been AWOL!  I've been super-busy, most of you probably know why, but I'll put up a post regarding my most recent happenings anyway.  In the meantime, I hope you'll be *somewhat* satisfied with a product review.  I've actually been wanting to try this eyeliner for awhile, but I've been so addicted to my Prestige liquid liner that I never got around to getting this one until now:


I ran out of my fav liquid liner and, unfortunately, CVS doesn't sell it anymore so I've been browsing, but didn't find anything I liked until I decided to get this one.

MAC Fluidline much?
I'm a big fan of MAC's Fluidline, but it's on the expensive side.  Well, this here is pretty much the same damn thing, except it'll only cost you about $6.50 at Target.  I wouldn't use the brush that it comes with, however.  I applied mine with Sonia Kashuk's bent eyeliner brush, also available at Target.  The formula is smooth and creamy and it applies very evenly.  It's been a really hot day today as well, and it's lasted pretty good without any smearing or smudging.


What else can I say?  It cheap and excellent in quality.  Hell, I don't think I'd ever have to buy another brand of gel/creme eyeliner again!  I'm definitely a happy camper. :D


Happy First Day of Summer, btw!  And, off topic, the bangs were fun, but I think I'm gonna get rid of them.  More on that later.

Hugs,
Cat

Wednesday, June 15, 2011

Eyeshadow Look: Green Queen!

Hello!  It was my day off today so I decided to experiment with a simple, bright look incorporating a color that I rarely use: gaudy grass green.


This was a *very* simple look that only required 3 color elements plus primer, eyeliner, and mascara.  Here are the products used for this look:

1. Urban Decay Primer Potion in Eden

2. CoverGirl Eye Enhancers eyeshadow in Chartreuse (used in this tutorial: Cheerful Chartreuse)
3. CoverGirl LiquiLine Blast eyeliner in Blue Boom
4. Bright grass green from the ELF 100 Shadow Palette

5. L'Oreal Lineur Intense liquid eyeliner in Black
6. Maybelline Full N Soft Waterproof mascara in Black

In order to match my eye makeup, I decided to deck myself out ala old school Super Mario Bros.  I got to enjoy my first warm, sunny day of true summer in extreme green style!  Wheeeeeee!

Monday, June 13, 2011

Lovelina: Summer Inspired Pieces

Hey all, sorry for the lack of updates as of late.  Been busy as a bee due to some (potentially) exciting news.  I don't want to jump the gun though, so I'm keeping everything under wraps until I get confirmation.  In the meantime, enjoy these new, summer-inspired pieces that I've whipped up over the week.


Monday, June 6, 2011

Beauty Tutorial: Mint and Teal Fanime Makeup

Here are step-by-step instructions on how to replicate the look I did for Fanimecon 2011.  Here are the 2 basic eyeshadows I used, the bright teal from the Wet N Wild palette and the mint shade from the Sonia Kashuk shadow duo.

Sonia Kashuk Taunting Teal Duo and Wet N Wild ColorIcon Palette in Blue Had Me At Hello


Step 1:
I start with a clean, naked eye.


Step 2:
I apply eyeshadow primer on my entire top lid.

Urban Decay Primer Potion in Eden
Step 3:
I apply an even layer of mint shadow on my upper lid to the brow bone.


Step 4:
I line my top and bottom lid heavily with bright blue eyeliner.

Covergirl Liquiline Blast in Blue Boom
Step 5:
I layer the teal shadow over the eyeliner, making sure to blend and smudge as I do so.


Step 6:
Just to soften the edges, I'm going to apply a little mint shadow to the edge of the bottom liner.  As a bonus, it brightens the under-eye area, making you appear luminous and awake.


Step 7:
I apply liquid eyeliner to the top and bottom lid lines, making a thin wing as not to compete with the bright blues.

L'Oreal Lineur Intense Felt Tip Eyeliner in Carbon Black
Final Step:
I curl my lashes and apply mascara.


There you have it!  The steps are simple and the results are stunning.  I hope y'all have as much fun practicing this look as much as I had fun showing it to you. ^_^


Hugs, 
Cat


Wednesday, June 1, 2011

New Hairstyle: The Big Bang!

For the past few months I've been complaining about how I hate my hair.  I've just been sooooooooo bored with it.  So, today, I decided to bite the bullet and do something about it.  I had been entertaining the thought of having a bold, strong bang for awhile, but have shied from it because I haven't had bangs since I was 11 years old.  I HATED bangs back then because  my mom forced them on me.  Having bowl-cut bangs is a traditional look for little Vietnamese girls and I couldn't wait until I was old enough to get rid of them for good.

Oh how times have changed.  The mushroom-head look suddenly seemed so appealing.  I was in San Francisco Japantown on Monday and saw this photo in the Kinokuniya bookstore:


I was sold at first site.  Of course, I didn't want to pay the $18 for the magazine that this style was featured in, so I decided to be a sneak and stole off to some quiet corner of the store and saved this image to my iPhone.

I went to my longtime hairstylist today and shoved it in his face.  "Make me look like this!" I told him.  After an hour and a half, I came out looking like this:

That's Danny and me.  He's amazing!  Didn't he do a wonderful job?
I'm really happy with the results and am grateful for the change.  I almost chickened out at the last minute, but decided, "what the heck, hair grows back anyway, right?"

Me this morning vs. me right now (in my jammies)
Pros:
1. My hair looks great!  I'm so excited about the change!
2. Drawing in my eyebrows is now optional.

Cons:
1. My bangs poke me in the eyes and my peripheral vision is now limited.
2. I need to get them trimmed every 2-3 weeks.

All in all, I'm pretty happy.  I'm thinking about going back to get the bangs trimmed up a little higher because, while this looks good, it really annoys the heck out of me to have something brushing up against my lashes 24/7.  Let me know your thoughts.

Lovelina: Romantic Earrings

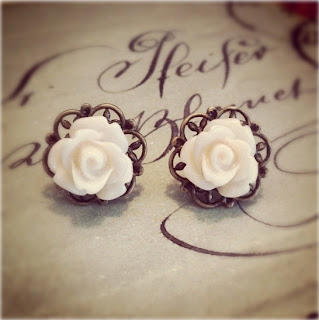
I'm obsessed with rose blooms in pretty pastel shades for this summer.  There's a certain vintage, country chic to them, don't you think?  Here are a couple pairs of earrings I created over the weekend.

Ivory Victorian Filigree Rose Earrings

Mint Rose Blossom Earrings

Both pairs are available for purchase here at my Lovelina etsy shop.  I've been adorning my ear lobes with roses on a near-daily basis.  I just can't get enough!